Tag: Visual edit |
(→Trivia) Tag: Visual edit |
||
| (49 intermediate revisions by 27 users not shown) | |||
| Line 1: | Line 1: | ||
| − | {{Featured Article}} |
||
{{Game Info |
{{Game Info |
||
|Title = ''Unleash the Light'' |
|Title = ''Unleash the Light'' |
||
|Image = <gallery> |
|Image = <gallery> |
||
| + | UTL4.0Cover.png|4.0 Cover |
||
| + | UTL3.0Cover.png|3.0 Cover |
||
UTLCover.png|Cover |
UTLCover.png|Cover |
||
| + | Unleash The Light 4.0 Icon.jpg|4.0 Icon |
||
| + | UnleashTheLightIcon3.jpg|3.0 Icon |
||
123456789.png|2.0 Icon |
123456789.png|2.0 Icon |
||
1575152571944.png|1.0 Icon |
1575152571944.png|1.0 Icon |
||
| Line 14: | Line 17: | ||
|Genre = Action-adventure, role-playing |
|Genre = Action-adventure, role-playing |
||
|Ratings = 9+}} |
|Ratings = 9+}} |
||
| − | '''''Steven Universe: Unleash the Light''''' is a mobile game developed by [[Grumpyface Studios]] |
+ | '''''Steven Universe: Unleash the Light''''' is a mobile game developed by [[Grumpyface Studios]] that was announced as part of the Apple Arcade Announcement Event on September 10, 2019.<ref>[https://www.apple.com/newsroom/2019/09/apple-arcade-invites-you-to-play-something-extraordinary/ "Apple Arcade invites you to play something extraordinary"] – Apple Newsroom</ref> The game was co-written by [[Rebecca Sugar]] and is a direct sequel to ''[[Attack the Light]]'' and ''[[Save the Light]]'', featuring similar gameplay. |
The game was first released on the Apple Arcade catalog on November 27, 2019, <ref>https://twitter.com/cartoonnetwork/status/1199734739659350017 – Cartoon Network</ref> and later for PS4, Xbox One, Xbox Series X/S, Nintendo Switch, and Steam on February 19, 2021.<ref>https://twitter.com/cartoonnetwork/status/1360302658142097410</ref> |
The game was first released on the Apple Arcade catalog on November 27, 2019, <ref>https://twitter.com/cartoonnetwork/status/1199734739659350017 – Cartoon Network</ref> and later for PS4, Xbox One, Xbox Series X/S, Nintendo Switch, and Steam on February 19, 2021.<ref>https://twitter.com/cartoonnetwork/status/1360302658142097410</ref> |
||
| − | ==Synopsis== |
+ | == Synopsis == |
''“Steven Universe: Unleash the Light,” is an original Cartoon Network game, co-written by Rebecca Sugar, where players pick their favorite characters, choose which [[Gems]] are in their party, unlock awesome new abilities and equip alternate costumes in the ultimate mobile role-playing game (RPG).'' |
''“Steven Universe: Unleash the Light,” is an original Cartoon Network game, co-written by Rebecca Sugar, where players pick their favorite characters, choose which [[Gems]] are in their party, unlock awesome new abilities and equip alternate costumes in the ultimate mobile role-playing game (RPG).'' |
||
| − | ==Features== |
+ | == Features == |
| − | ''''' |
+ | '''''9 PLAYABLE CHARACTERS''''' |
| − | ''Play as your favorite [[Steven Universe (TV series)|Steven Universe]] characters, including [[Steven Universe (character)|Steven]], [[Garnet]], [[Pearl]], [[Amethyst]], [[Lapis Lazuli]], [[Bismuth (character)|Bismuth]], and [[ |
+ | ''Play as your favorite [[Steven Universe (TV series)|Steven Universe]] characters, including [[Steven Universe (character)|Steven]], [[Garnet]], [[Pearl]], [[Amethyst]], [[Lapis Lazuli]], [[Bismuth (character)|Bismuth]], [[Peridot]], [[Connie Maheswaran|Connie]], and [[Greg Universe|Greg]]!'' |
'''''CUSTOMIZE YOUR TEAM''''' |
'''''CUSTOMIZE YOUR TEAM''''' |
||
| Line 36: | Line 39: | ||
'''''[[Fusion Gems|FUSION]] TIME!''''' |
'''''[[Fusion Gems|FUSION]] TIME!''''' |
||
| − | ''Team up for amazing combo attacks and Gem Fusions! Fuse to play as [[Smoky Quartz]], [[Sunstone]] |
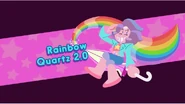
+ | ''Team up for amazing combo attacks and Gem Fusions! Fuse to play as [[Smoky Quartz]], [[Sunstone]], [[Rainbow Quartz 2.0]], and [[Obsidian]]!'' |
'''''ORIGINAL VO''''' |
'''''ORIGINAL VO''''' |
||
| Line 44: | Line 47: | ||
== Plot == |
== Plot == |
||
=== v1.1.0 === |
=== v1.1.0 === |
||
| − | It starts off with Steven |
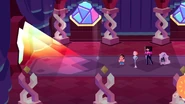
+ | It starts off with Steven finishing writing new rules for [[Gem Homeworld#Era 3|Era 3]] accompanied by [[Blue Pearl]], [[Yellow Pearl]], and [[Pink Pearl]] in the Diamond Throne Room at [[Gem Homeworld]]. While having a conversation, Yellow Pearl mentions that there are two [[Light Prism]]s still active and she has been contacting two Gems named [[Pyrope]] and [[Demantoid]]; thus far she was unsuccessful. Blue Pearl states that if they don't respond they could send a battalion to retrieve the Prisms by force which Steven disagrees to. Pink Pearl asks what the right solution is and Steven answers that he knows the right team for the job. |
| − | Steven brings the [[Crystal Gems]] to the Palace of Light |
+ | Steven brings the [[Crystal Gems]] to the Palace of Light which is owned by the two Garnets. When he tries to introduce himself to Demantoid, Pyrope interrupts asking Demantoid who she's talking to. Upon realizing who he is Pyrope hurriedly tells them the palace is closed and the two take their leave. While the Crystal Gems think about how to enter, they once again encounter [[White Light|Hessonite's Prism]] who not only took on a new form but has chosen the name George. George shows them that he can dissipate Prism-protected doors only to discover that the rest of the palace is locked and they need rainbow keys to enter. This is 'helpfully' pointed out by [[Hessonite]] who has become a 'mysterious ally' to the gems. The gems decide to follow Demantoid after hacking a comlink from a previous colony in the making with Pearl staying to find out more about Demantoid while [[Lapis Lazuli]] goes with them to one of Yellow Diamond's mining colonies. |
| − | In Crystal System Colony 215, it's revealed that Demantoid has been releasing Light constructs through the colony disrupting the work of several [[Peridots]]. One of said Peridots, |
+ | In Crystal System Colony 215, it's revealed that Demantoid has been releasing Light constructs through the colony disrupting the work of several [[Peridots]]. One of said Peridots, Peri Pal informs Steven that the Peridots know due to the commlinks before Demantoid cut all communication from Homeworld and prohibited any interaction with Steven, unfortunately, the Light constructs from her Prism are causing damage to their buildings which makes the Crystal Gems help them and Pearl informs Steven that Demantoid and Pyrope after hearing of Era 3 saw it as a chance to make their own empires due to the power vacuum caused. After fighting Light constructs controlling a drill they discover Demantoid already left to another colony owned by her. |
| − | In Demantoid's world |
+ | In Demantoid's world they learn she has been using Light constructs to replace her [[Bismuths]] during its terraformation. The Bismuths, unable to continue their work are wondering what to do now. Steven explains that the new rules of Era 3 set them free and they should have their own ruling system. Along the way, they meet Bismuth who reveals to have made a Prism Containment Chest to disable both Prisms. After fighting several constructs they encounter Demantoid who modified her Prism. Steven tries to convince her to surrender, only for Demantoid to reply that, for her, Steven's Era 3 is a chance for them to make their own empire now that he has proven that the Diamonds are obsolete. After defeating her Bismuth tries to use the box only to be attacked by Demantoid until Steven saves her by throwing his shield. The Bismuths decide to rebel against Demantoid only for her to leave with the box much to the disappointment of the Crystal Gems. The group decides to follow her to Blue Colony 4 controlled by Pyrope. |
| − | Upon arrival, the Gems find the colony in ruins |
+ | Upon arrival, the Gems find the colony in ruins and are confused when the inhabitants, a variety of [[Jades#Unleash the Light|Jades]] seem worried to speak with them. One Jade reveals that the Palace of Light was formerly located on the planet and they have not been permitted to receive broadcasts or leave. After navigating the colony the team encounters another group of light constructs who have taken the forms of Garnet, Amethyst, Pearl and Steven to battle them. They then set their sights on the Palace of Light to unlock all the doors and confront Pyrope face to face. |
| − | Once they unlock |
+ | Once they unlock all the barriers the Crystal Gems fought through Pyrope's residence to find her sitting in her personal room. They attempt to convince her to stop using the prisms when Demantoid arrives and begins to bicker with Pyrope. Bismuth, noticing the box, tells Steven she will try to take it before Hessonite arrives to "aid" them. Hessonite brags to the other Garnets about her humbleness before she is struck, knocking off her scarf and visor. Pyrope is surprised by this and Demantoid says that there is still time to join them, but Hessonite refuses. Demantoid states that she wasn't talking to her but George who she captures and combines with the other two prisms. After fighting the two Garnets and their Prism monster Steven convinces George to fight back before being silenced by Demantoid. This causes Hessonite to stand up to her and apologize to George telling him he doesn't have to be a weapon anymore. George causes the monster to defuse and reunites with Steven. With her Prism locked away, Demantoid loses her [[Limb Enhancers]] and blames Pyrope who blames her back. The two poof each other and Hessonite takes over the palace promising to open it back to gemkind. George has Bismuth release the other prisms, and he convinces them the three of them are now free. Pearl then reminds Steven that there are still other colonies that are yet to be freed, so the Crystal Gems decide to stay in Homeworld for a while to help establish Era 3. |
| − | After the credits roll, a mysterious green ship resembling the one used by [[Peridot (Squaridot)|"Squaridot"]] |
+ | After the credits roll, a mysterious green ship resembling the one used by [[Peridot (Squaridot)|"Squaridot"]] comes into view and a laugh similar to the ones made by Peridots is heard before disappearing. |
=== v2.0 === |
=== v2.0 === |
||
| Line 65: | Line 68: | ||
On the warship, power is turned off and Steven and his friends make their way through the locked doors to Squaridot. Finally, they arrive at the ship's controls and fight Squaridot, but it turns out to be a Squaribot decoy. The real Squaridot emerges, controlling the computer, and the team battles her and her army of Squaribots as Peridot hacks the system to shut it down. |
On the warship, power is turned off and Steven and his friends make their way through the locked doors to Squaridot. Finally, they arrive at the ship's controls and fight Squaridot, but it turns out to be a Squaribot decoy. The real Squaridot emerges, controlling the computer, and the team battles her and her army of Squaribots as Peridot hacks the system to shut it down. |
||
| − | After the final battle, Peridot successfully hacks the system and releases Squaridot of her control. However, she has no memory of the events and was only trying to locate Hessonite. Upon activating the ship's emergency protocol, Squaridot was controlled by the program to find the Prism. Squaridot begrudgingly thanks the Gems and is taught about Era 3, while Steven invites her to Beach City. |
+ | After the final battle, Peridot successfully hacks the system and releases Squaridot of her control. However, she has no memory of the events and was only trying to locate Hessonite. Upon activating the ship's emergency protocol, Squaridot was controlled by the program to find the Prism. Squaridot begrudgingly thanks the Gems and is taught about Era 3, while Steven invites her to Beach City. |
| + | |||
| ⚫ | |||
| + | George was surprised about the distress signal, and Peridot tells the Gems what they received, so Peridot said that it came from the black hole, Garnet agreed, "the same black hole that out Yellow Colony 4" from the looks of it. Steven said "Whoa", as Peridot, "Whoa is right", as they have to stay away from there, but she's getting strange readings originated from it, and extremely mysterious and alluring and Steven was curious to check it out. But before that at the entrance of the Palace of Light, he heard a roar was Lion and Connie have arrived that she's caught up on schoolwork and ready to liberate the galaxy and Steven cheers. She hears about the Prism mission, and meets George and looks amazed, she was curious about the this place, and do walk and talk and Steven agreed, so Steven and the Gems travel to the black hole where it sucked up Yellow Colony 4. |
||
== Characters == |
== Characters == |
||
| Line 75: | Line 81: | ||
* [[Lapis Lazuli]] |
* [[Lapis Lazuli]] |
||
* [[Bismuth (character)|Bismuth]] |
* [[Bismuth (character)|Bismuth]] |
||
| − | * [[Peridot]] |
+ | * [[Peridot]] (v2.0 update) |
| − | *[[Connie Maheswaran|Connie]] and [[Lion]]<ref>https://grumpyfaceblog.tumblr.com/post/648380152718442496/new-adventurers-approaching-connieandlion-are#notes</ref> |
+ | * [[Connie Maheswaran|Connie]] and [[Lion]] (v3.0 update)<ref>https://grumpyfaceblog.tumblr.com/post/648380152718442496/new-adventurers-approaching-connieandlion-are#notes</ref> |
| + | * [[Greg Universe]] (v4.0 update)<ref>https://twitter.com/Grumpyface/status/1537516911361003520</ref> |
||
| + | *[[Hessonite]] (v4.0 update) |
||
==== Fusions ==== |
==== Fusions ==== |
||
* [[Rainbow Quartz 2.0]] |
* [[Rainbow Quartz 2.0]] |
||
* [[Sunstone]] |
* [[Sunstone]] |
||
| − | *[[Smoky Quartz]] (v1.1.0 update)<ref name="1.1.0">[https://grumpyfaceblog.tumblr.com/post/617562139201273856/new-unleash-the-light-content-update-v110 "A new free content update (v1.1.0) is now available for Steven Universe: Unleash the Light on Apple Arcade!"] – Grumpyface Studios on Tumblr</ref> |
+ | * [[Smoky Quartz]] (v1.1.0 update)<ref name="1.1.0">[https://grumpyfaceblog.tumblr.com/post/617562139201273856/new-unleash-the-light-content-update-v110 "A new free content update (v1.1.0) is now available for Steven Universe: Unleash the Light on Apple Arcade!"] – Grumpyface Studios on Tumblr</ref> |
| + | * [[Obsidian]] (v3.0 update) |
||
=== NPCs === |
=== NPCs === |
||
| Line 102: | Line 111: | ||
* [[Peridot (Squaridot)|"Squaridot"]] (v2.0 update) |
* [[Peridot (Squaridot)|"Squaridot"]] (v2.0 update) |
||
* Squaribots (debut; v2.0 update) |
* Squaribots (debut; v2.0 update) |
||
| + | * Pyrope Light construct (debut; v3.0 update) |
||
| + | * Demantoid Light construct (debut; v3.0 update) |
||
| + | *[[Hessonite]] (v4.0 update) |
||
== Locations == |
== Locations == |
||
| Line 109: | Line 121: | ||
**** [[Gem Homeworld/Locations#Known Locations|Diamond Throne Room]] |
**** [[Gem Homeworld/Locations#Known Locations|Diamond Throne Room]] |
||
* [[Gem Homeworld/Locations#Crystal System Colony 215|Crystal System Colony 215]] (debut) |
* [[Gem Homeworld/Locations#Crystal System Colony 215|Crystal System Colony 215]] (debut) |
||
| − | ** CSC-215 Kindergarten (debut |
+ | ** CSC-215 Kindergarten (debut) |
* [[Gem Homeworld/Locations#Demantoid's World|Demantoid's World]] (debut) |
* [[Gem Homeworld/Locations#Demantoid's World|Demantoid's World]] (debut) |
||
* [[Gem Homeworld/Locations#Pyrope's World (Blue 4)|Pyrope's World (Blue 4)]] (debut) |
* [[Gem Homeworld/Locations#Pyrope's World (Blue 4)|Pyrope's World (Blue 4)]] (debut) |
||
| Line 116: | Line 128: | ||
* [[Earth]] (mentioned) |
* [[Earth]] (mentioned) |
||
** [[Beach City]] (mentioned) |
** [[Beach City]] (mentioned) |
||
| − | *** [[Beach House]] |
+ | *** [[Beach House]] (title screen) |
| − | ** [[Little Homeworld]] |
+ | ** [[Little Homeworld]] (mentioned; v2.0 update) |
| + | ** Connie's school (mentioned; v3.0 update) |
||
* Hessonite's warship (v2.0 update) |
* Hessonite's warship (v2.0 update) |
||
| + | * Black Hole (debut; v3.0 update) |
||
* Other colonies (mentioned) |
* Other colonies (mentioned) |
||
| + | * [[Rose's Room (location)|Rose's Room]] (v4.0 update) |
||
== Objects == |
== Objects == |
||
* [[Warp Pad]] |
* [[Warp Pad]] |
||
| − | * [[Injectors]] |
+ | * [[Injectors]] |
* [[Attack Pod]] |
* [[Attack Pod]] |
||
== Items == |
== Items == |
||
| − | |||
=== Steven's Items === |
=== Steven's Items === |
||
| + | * [[Cookie Cat]] - ''Restores some health. Yum!'' |
||
| − | |||
| + | * A Big Donut - ''Restores a lot of health. Tasty!'' |
||
| − | * [[Cookie Cat]] |
||
| + | * Ube Roll Cake - ''Restore '''TONS''' of health. Just divine!!'' |
||
| − | * Big Donut |
||
| + | * [[Together Breakfast (food)|Together Breakfast]] - ''Restores some health for the full team. So good!'' |
||
| − | * Ube Roll Cake |
||
| − | * |
+ | * Together Forever Breakfast - ''Restores a lot of health for the entire team! Hooray!'' |
| + | * Star Fruit - ''Adds 3 Star Points in Battle. So useful!'' |
||
| − | * Together Forever Breakfast |
||
| + | * Super Star Fruit - ''Adds 6 Star Points in Battle. Wow!!'' |
||
| − | * Star Fruit |
||
| + | * Star Melon - ''Adds 1 Star Point every turn for the next 9 turns.'' |
||
| − | * Super Star Fruit |
||
| + | * Lucky Crown - ''Increases '''Luck''' for the next 5 turns.'' |
||
| − | * Star Melon |
||
| + | * Feelgood Tea - ''Removes negative status effects. How nice!'' |
||
| − | * Lucky Crown |
||
| + | * Feelgreat Tea - ''Removes the '''WHOLE TEAM’S''' negative status effects.'' |
||
| − | * Feelgood Tea |
||
| + | * Gamepad - ''Allows a second '''Formation Swap''' to be used in a single turn.'' |
||
| − | * Feelgreat Tea |
||
| + | * Wailing Stone - ''Every enemy will target the chosen character for the next 3 turns. (Doesn’t stop area or lane attacks from hitting teammates.)'' |
||
| − | * Gamepad |
||
| + | * Fire Salt - ''Attacks and blocks apply '''Burn''' effect to enemies for 4 turns.'' |
||
| − | * Wailing Stone |
||
| + | * Ninja G.U.Y. - ''Prevents being directly targeted by enemies for the next 3 turns. (Doesn’t stop area or lane attacks from hitting teammates.)'' |
||
| − | * Fire Salt |
||
| − | * Ninja G.U.Y. |
||
* [[Minor Objects/Food#Fry Bits|Fry Bits]] |
* [[Minor Objects/Food#Fry Bits|Fry Bits]] |
||
| − | * Ranch n' Bacon Fry Bits |
+ | * Ranch n' Bacon Fry Bits - ''The entire team receives a small health regen every turn for the next 5 turns.'' |
| − | * Bicycle Helmet |
+ | * Bicycle Helmet - ''Increases '''Defense''' for the next 5 turns.'' |
| − | * Beefy Sweatband |
+ | * Beefy Sweatband - ''Increases '''Attack''' power for the next 5 turns.'' |
| − | * Friendship Glow Bracelet |
+ | * Friendship Glow Bracelet - ''Partially fills the Teamwork Bar.'' |
| − | * Rose's Tear |
+ | * Rose's Tear - ''Revives a teammate with a little health.'' |
| − | * Bottle of Rose's Tears |
+ | * Bottle of Rose's Tears - ''Revives a teammate with a lot of health.'' |
| + | * Redo Idol - ''Reset one character’s upgrades and return all upgrade points, allowing them to be re-spent. (Cannot be used while in Battle)'' |
||
| − | * Redo Idol |
||
* Level Up Idol |
* Level Up Idol |
||
| − | |||
| − | <br /> |
||
=== Quest Items === |
=== Quest Items === |
||
| − | |||
* PrismDex |
* PrismDex |
||
| − | * Prism Containment Chest |
+ | * [[Minor Objects/Miscellaneous#Prism Containment Chest|Prism Containment Chest]] |
* Forging List |
* Forging List |
||
* Bismuth's Gem |
* Bismuth's Gem |
||
| Line 174: | Line 184: | ||
* Costume Schematic |
* Costume Schematic |
||
* Containment Chest Schematic |
* Containment Chest Schematic |
||
| + | * Charm Schematic |
||
| + | * Battle Gift Schematic |
||
| − | <br /> |
||
=== Badges === |
=== Badges === |
||
| ⚫ | |||
| + | * '''Attack the Light Badge''': Increases ATTACK by 5%. |
||
| ⚫ | |||
| ⚫ | |||
| ⚫ | |||
| ⚫ | |||
| ⚫ | |||
| ⚫ | |||
| ⚫ | |||
| ⚫ | |||
| ⚫ | |||
| ⚫ | |||
| ⚫ | |||
| ⚫ | |||
| ⚫ | |||
| ⚫ | |||
| ⚫ | |||
| ⚫ | |||
| ⚫ | |||
| ⚫ | |||
| ⚫ | |||
| ⚫ | |||
| ⚫ | |||
| ⚫ | |||
| ⚫ | |||
| ⚫ | |||
| ⚫ | |||
| ⚫ | |||
| ⚫ | |||
| ⚫ | |||
| + | * '''Onion's Badge''': The wearer's Perfect Blocks now always BURN enemies. |
||
| + | * '''Prism Pal Badge''': George's teamwork ability grants a Teamwork Buff to the wearer. While active, every ability used by the wearer generates bonus Teamwork points. |
||
| + | * '''Rose's Tear Badge''': After being defeated, there's a 33% chance on every turn to automatically revive. |
||
| ⚫ | |||
| − | * ''' |
+ | * '''Ambidextrous Badge''': The wearer can now activate two costume perks at once. |
| ⚫ | |||
| ⚫ | |||
| ⚫ | |||
| ⚫ | |||
| ⚫ | |||
| ⚫ | |||
| ⚫ | |||
| ⚫ | |||
| ⚫ | |||
| ⚫ | |||
| ⚫ | |||
| ⚫ | |||
| ⚫ | |||
| ⚫ | |||
| ⚫ | |||
| ⚫ | |||
| ⚫ | |||
| ⚫ | |||
| ⚫ | |||
| ⚫ | |||
| ⚫ | |||
| ⚫ | |||
| ⚫ | |||
| ⚫ | |||
| ⚫ | |||
| ⚫ | |||
| ⚫ | |||
| ⚫ | |||
| − | <br /> |
||
=== Alternate Costumes === |
=== Alternate Costumes === |
||
| − | |||
==== Steven ==== |
==== Steven ==== |
||
| − | * Costume #2: Varsity Jacket [Blue and Black Variation] |
+ | * Costume #2: Varsity Jacket [Blue and Black Variation] - Extra Pockets: Once per battle, allows two items to be used in a single turn. |
* Costume #3: Pink Diamond Outfit - Perseverance: The first time Steven is defeated in battle, he will automatically revive with low health. |
* Costume #3: Pink Diamond Outfit - Perseverance: The first time Steven is defeated in battle, he will automatically revive with low health. |
||
| Line 231: | Line 244: | ||
==== Lapis Lazuli ==== |
==== Lapis Lazuli ==== |
||
* Costume #2: Pre-regeneration - Inner Turmoil: Lapis has a 15% chance to complete focus instantly after starting it. |
* Costume #2: Pre-regeneration - Inner Turmoil: Lapis has a 15% chance to complete focus instantly after starting it. |
||
| − | * Costume #3: Bob Outfit - Batter Up: While in Focus, Lapis cannot be interrupted by small and |
+ | * Costume #3: Bob Outfit - Batter Up: While in Focus, Lapis cannot be interrupted by small and medium projectiles, and also knocks them back to her attacker. |
==== Bismuth ==== |
==== Bismuth ==== |
||
| Line 239: | Line 252: | ||
==== Peridot ==== |
==== Peridot ==== |
||
* Costume #2: Pre-regeneration - Gem Technician: Peridot now automatically places a Robonoid after her first formation swap in every battle. |
* Costume #2: Pre-regeneration - Gem Technician: Peridot now automatically places a Robonoid after her first formation swap in every battle. |
||
| − | * Costume #3: Yellow dress |
+ | * Costume #3: Yellow dress - I've Come So Far: Every time the Teamwork Bar is filled, Peridot encourages her friends and all characters receive a small heal. |
| + | |||
| + | ==== Connie and Lion ==== |
||
| + | * Costume #2: Training Outfit - Extensive Training: Connie & Lion now achieve "Lucky Blocks" when performing a perfect block. Lucky Blocks reduce 25% more damage than normal. |
||
| + | * Costume #3: Debut Outfit - Well Studied: Every time the teamwork bar is filled, Connie & Lion receive an Expertise buff that lowers the SP cost of all their abilities by 1 for the remainder of the turn. |
||
== Achievements == |
== Achievements == |
||
| Line 245: | Line 262: | ||
* Giant Woman: Perform any fusion. |
* Giant Woman: Perform any fusion. |
||
* Risky Bismuth: Protect your teammate from Demantoid. (Secret) |
* Risky Bismuth: Protect your teammate from Demantoid. (Secret) |
||
| − | *The Box That Rocks: Prevent the Prism Containment Chest from being stolen. (Secret) |
+ | * The Box That Rocks: Prevent the Prism Containment Chest from being stolen. (Secret) |
* Over 9000: Fully Level Up all of the Crystal Gems. |
* Over 9000: Fully Level Up all of the Crystal Gems. |
||
* Steven's RPG: Learn the ropes. |
* Steven's RPG: Learn the ropes. |
||
| Line 258: | Line 275: | ||
* Keys are the Key, You See: Unlock every Light Barrier in the Palace of Light. |
* Keys are the Key, You See: Unlock every Light Barrier in the Palace of Light. |
||
* It's A Secret to Everybody!: Discover a secret room! |
* It's A Secret to Everybody!: Discover a secret room! |
||
| − | *Shorty Squad: Complete 10 battles with Amethyst and Peridot in your party. |
+ | * Shorty Squad: Complete 10 battles with Amethyst and Peridot in your party. |
| − | *Green Thumb: Use Peridot's teamwork ability to summon a loyal friend... |
+ | * Green Thumb: Use Peridot's teamwork ability to summon a loyal friend... |
| − | *Be There Or Be Square: Decipher the mysterious space message. |
+ | * Be There Or Be Square: Decipher the mysterious space message. |
| − | *Era 3 Winning Spree: Complete the Secret Chapter. |
+ | * Era 3 Winning Spree: Complete the Secret Chapter. |
| − | *Clod Goals: Defeat 3 enemies at once with Peridot's Self Destruct Robonoids ability. |
+ | * Clod Goals: Defeat 3 enemies at once with Peridot's Self Destruct Robonoids ability. |
| + | * The Cat-valry's Here: Defeat 2 or more enemies with a single use of Connie & Lion's Lion Charge ability. |
||
| + | * Prismatic Procuration: Collect a Rainbow Charm |
||
| + | * Little Homeschool: Recieve an "A++" Grade in the Black Hole chapter. |
||
| + | * Crying Breakfast Friend: Complete any run of the Black Hole chapter while wearing the CBF Badge the entire time. |
||
| + | * Space Train to the Cosmos: Complete the Black Hole chapter on all 3 difficulties. |
||
| + | *Jam With Your Old Man: Have a jam session with Steven and Greg. |
||
| + | *Precious Stone: Fully rank up one character in Rose’s Room. |
||
| + | *Rose’s Room: Complete a full Magical Mission in Rose’s Room. |
||
| + | *Graced by Her Presence: Convince an unlikely ally to become a Crystal Gem. |
||
| + | *The Tiny Floating Whale Approves: Complete a Magical Mission in Rose’s Room without any characters being defeated. |
||
| + | *Can’t Believe We’ve Come So Far: Complete every character’s Magical Mission in Rose’s Room. |
||
| − | Note: Achievements with the (Secret) denomination were added in the Ver. 1.1.0 update. In the game, only one is obtainable (besides resetting your save data) depending on your choice in the Chapter 2 boss. |
+ | Note: Achievements with the (Secret) denomination were added in the Ver. 1.1.0 update. In the game, only one is obtainable (besides resetting your save data) depending on your choice in the Chapter 2 boss. This has been changed in Ver. 3.0 update. where you can now battle the Chapter 2 boss again. |
| − | |||
| ⚫ | |||
| ⚫ | |||
| ⚫ | |||
| ⚫ | |||
| − | |||
| ⚫ | |||
| ⚫ | |||
| ⚫ | |||
| − | b2d9de3e12e64ca39ce12c271a3e7f98.jpg |
||
| − | afa64c4c23314a37ab6ab7b89d0bd3ac.jpg |
||
| − | cf0c3e4d815c484da02d1119717cf4ff.jpg |
||
| − | f4dee53fc0244e6ab6503477b24fd2c7.jpg |
||
| − | f0d550c6558a4271b56ae535b8148f39.jpg |
||
| ⚫ | |||
| − | e9e4fda6323043cb85610827b2122bc0.jpg |
||
| ⚫ | |||
| ⚫ | |||
| ⚫ | |||
| ⚫ | |||
| ⚫ | |||
| ⚫ | |||
| ⚫ | |||
| − | </gallery> |
||
== Trivia == |
== Trivia == |
||
| − | * Players are able to change the outfits of playable characters. |
+ | * Players are able to change the outfits of playable characters. |
* Once you 100% the game, you unlock Steven's Black Shirt, It is a variation of the Varsity Jacket Outfit. |
* Once you 100% the game, you unlock Steven's Black Shirt, It is a variation of the Varsity Jacket Outfit. |
||
| − | * |
+ | * Bismuth's voice is provided by [[Miriam Hyman]] instead of her usual voice actress, [[Uzo Aduba]]. |
| + | * There are no plans for an android version.<ref>https://grumpyfaceblog.tumblr.com/post/689512004275339264/will-unleash-the-light-have-a-new-update-to</ref> |
||
* The game has some meta-awareness: |
* The game has some meta-awareness: |
||
| − | ** One of Steven's lines when entering a level is: ''"You know, for Prisms saving adventures, third time's the charm!"'', a reference that this game is |
+ | ** One of Steven's lines when entering a level is: ''"You know, for Prisms saving adventures, third time's the charm!"'', a reference that this game is the third one in the ''Light'' Series. |
| − | ** If you select Pearl from the menu, one of her quotes is ''"What's this about a bird mom?"'', a reference to the popular nickname given by the fandom. |
+ | ** If you select Pearl from the menu, one of her quotes is ''"What's this about a bird mom?"'', a reference to the popular nickname given by the fandom.<ref>https://twitter.com/caitvihugs/status/1199843080805011457</ref> |
| − | *** Pearl also says ''"Steven, can you explain it to me again. What is a 'meme'?"'', might |
+ | *** Pearl also says ''"Steven, can you explain it to me again. What is a 'meme'?"'', might be a reference to Momocon 2017 where people taught [[Deedee Magno-Hall]] about memes. |
** One of the items used by Garnet is pastel blue-and-red colored Cotton Candy Gauntlets, a reference to her fan nickname "Cotton Candy Garnet" (her form when Ruby and Sapphire first fused). |
** One of the items used by Garnet is pastel blue-and-red colored Cotton Candy Gauntlets, a reference to her fan nickname "Cotton Candy Garnet" (her form when Ruby and Sapphire first fused). |
||
*** Another item that references this is the Cotton Candy Keytar. |
*** Another item that references this is the Cotton Candy Keytar. |
||
| − | ** Some of Lapis' lines reference her being |
+ | ** Some of Lapis' lines reference her being a DLC character that never released for ''Save the Light'': |
| − | ***''"Hey guys, sorry I'm late."'' |
+ | *** ''"Hey guys, sorry I'm late."'' |
*** ''"Looking forward to helping out this time."'' |
*** ''"Looking forward to helping out this time."'' |
||
*** ''"Yep, I'm here this time."'' |
*** ''"Yep, I'm here this time."'' |
||
| − | ***''"Better late than never."'' |
+ | *** ''"Better late than never."'' |
=== Cultural References === |
=== Cultural References === |
||
| − | * When using her "Focus" ability, Lapis says ''"You wouldn't like me when I'm mad."'', a reference to the [[ |
+ | * When using her "Focus" ability, Lapis says ''"You wouldn't like me when I'm mad."'', a reference to the [[Wikipedia:Hulk|Incredible Hulk]]. |
| − | * One of Lapis' menu lines is ''"I fight for my friends."'', which may be a reference to a popular quote spoken by Ike in the |
+ | * One of Lapis' menu lines is ''"I fight for my friends."'', which may be a reference to a popular quote spoken by [[w:c:fireemblem:Ike|Ike]] in the [[w:c:nintendo:Super Smash Bros. (series)|''Super Smash Bros.'' series]]. |
| + | * One of Connie's menu lines is ''"Good deduction never fails, that's for certain!"'', a reference to the theme song for ''[[w:c:disney:DuckTales|DuckTales]]''. |
||
| − | * Sometimes when opening a chest, Steven sings a tune that references the chest opening and item obtained sound effect in the |
+ | * Sometimes when opening a chest, Steven sings a tune that references the chest opening and item obtained sound effect in the [[w:c:zelda:The Legend of Zelda (Series)|''Legend of Zelda'' series]]. |
| − | * The "F-Capacitor" is possibly a reference to the [[w:c:backtothefuture:Flux capacitor|flux capacitor]] from the |
+ | * The "F-Capacitor" is possibly a reference to the [[w:c:backtothefuture:Flux capacitor|flux capacitor]] from the [[w:c:backtothefuture:Back to the Future (franchise)|''Back to the Future'' franchise]]. |
* The "Over 9000" achievement is a reference to the famous ''"IT'S OVER NINE-THOUSAND!"'' line from ''[[w:c:dragonball:Dragon Ball Z|Dragon Ball Z]]''. |
* The "Over 9000" achievement is a reference to the famous ''"IT'S OVER NINE-THOUSAND!"'' line from ''[[w:c:dragonball:Dragon Ball Z|Dragon Ball Z]]''. |
||
| + | * Connie saying ''"Adventure is out there!"'' references a line from the movie Up, the same line is referenced in ''[[Save the Light]]''. |
||
| + | *One of Bismuth’s Charms is a reference to the Master Sword from the Legend of Zelda Series. |
||
| + | *One of Peridot’s Charms is an alien plush that is a reference to Mario from the Super Mario Series. |
||
=== Continuity === |
=== Continuity === |
||
| Line 322: | Line 331: | ||
** ''"I will fight for the place where I'm free."'' from "[[We Are the Crystal Gems]]". |
** ''"I will fight for the place where I'm free."'' from "[[We Are the Crystal Gems]]". |
||
** ''"Back together (again)."'' and ''"Try to hit me if you're able."'' from "[[Stronger Than You]]". |
** ''"Back together (again)."'' and ''"Try to hit me if you're able."'' from "[[Stronger Than You]]". |
||
| + | |||
| ⚫ | |||
| + | * Pearl's line "Everything I am, I give on the battlefield" is a reference to "[[Do It for Her|Do it for Her]]". |
||
| + | ** Her line "It's not over" is a possible reference to "[[It's Over Isn't It]]". |
||
| + | ** Her line "Whoopsie-daisy" after recovering from being poofed is a reference to "[[Steven the Sword Fighter|Steven the Swordfighter]]". |
||
| + | |||
| ⚫ | |||
** The "Giant Woman" achievement is a reference to Steven's nickname for [[Opal]] in "[[Giant Woman (episode)|Giant Woman]]". |
** The "Giant Woman" achievement is a reference to Steven's nickname for [[Opal]] in "[[Giant Woman (episode)|Giant Woman]]". |
||
** The "Attack the Light" achievement is a reference to the first ''Light'' game, ''Attack the Light''. |
** The "Attack the Light" achievement is a reference to the first ''Light'' game, ''Attack the Light''. |
||
*** The "Attacked, Saved, Unleashed" achievement is a reference to all the ''Light'' games. |
*** The "Attacked, Saved, Unleashed" achievement is a reference to all the ''Light'' games. |
||
| − | ** The "Perfect Porkchop" achievement is a reference to |
+ | ** The "Perfect Porkchop" achievement is a reference to Greg's popular catchphrase as well as previous achievements from ''Attack'' and ''Save the Light''. |
** The "Cookie Cat Recall" achievement is a reference to [[Cookie Cat]]s getting discontinued prior to the original series starting. |
** The "Cookie Cat Recall" achievement is a reference to [[Cookie Cat]]s getting discontinued prior to the original series starting. |
||
| − | **The "Shorty Squad" achievement is a reference to Amethyst's nickname for her, Steven, and Peridot in "[[Too Short to Ride]]". |
+ | ** The "Shorty Squad" achievement is a reference to Amethyst's nickname for her, Steven, and Peridot in "[[Too Short to Ride]]". |
* Gems are still having trouble adapting to Era 3. |
* Gems are still having trouble adapting to Era 3. |
||
| − | *At the end of 1-10, Peridot mentions the events of ''Save the Light'' in which Squaridot was defeated, as well as the events of "[[Catch and Release]]." |
+ | * At the end of 1-10, Peridot mentions the events of ''Save the Light'' in which Squaridot was defeated, as well as the events of "[[Catch and Release]]." |
* It's revealed that the reason behind Bismuth's current regeneration, was because she was poofed by Demantoid after attempting to trap her Prism in the container box. |
* It's revealed that the reason behind Bismuth's current regeneration, was because she was poofed by Demantoid after attempting to trap her Prism in the container box. |
||
| − | == |
+ | == Transcript == |
| + | View the game's transcript [[Unleash the Light/Transcript|here]]. |
||
| ⚫ | |||
| + | |||
| ⚫ | |||
| ⚫ | |||
| ⚫ | |||
| + | <gallery widths="185"> |
||
| ⚫ | |||
| + | B2d9de3e12e64ca39ce12c271a3e7f98.jpg |
||
| + | Afa64c4c23314a37ab6ab7b89d0bd3ac.jpg |
||
| + | Cf0c3e4d815c484da02d1119717cf4ff.jpg |
||
| + | F4dee53fc0244e6ab6503477b24fd2c7.jpg |
||
| + | F0d550c6558a4271b56ae535b8148f39.jpg |
||
| ⚫ | |||
| + | E9e4fda6323043cb85610827b2122bc0.jpg |
||
| ⚫ | |||
| ⚫ | |||
| ⚫ | |||
| ⚫ | |||
| ⚫ | |||
| ⚫ | |||
| ⚫ | |||
| + | UtL v3.0 (1).jpg |
||
| + | UtL v3.0 (2).jpg |
||
| + | F4DF84E4-5183-4637-AB99-DAD8B2BAD480.png|Credits Background |
||
| + | File:Efz7sgWUEAAy-8 .jpg |
||
| + | File:Eg3bpcKU0AAiKgc.jpg |
||
| + | File:Eg3gL4iXcAEX4X2.jpg |
||
| + | File:ExbmxDiU8AMfhW9.jpg |
||
| + | File:EwyKvoYVkAAIw23.jpg |
||
| ⚫ | |||
| + | |||
| + | == Videos == |
||
| ⚫ | |||
| ⚫ | |||
| ⚫ | |||
| + | |||
| + | == External Links == |
||
| ⚫ | |||
| ⚫ | |||
| ⚫ | |||
| + | *[https://www.nintendo.com/store/products/steven-universe-unleash-the-light-switch/ Nintendo EShop] |
||
| + | *[https://www.xbox.com/en-US/games/store/steven-universe-unleash-the-light/9P4W445L49N5 Xbox Store] |
||
| + | *[https://store.playstation.com/en-us/product/UP1985-CUSA25214_00-4522027390669088 PlayStation Store] |
||
{{Reflist}} |
{{Reflist}} |
||
{{DISPLAYTITLE:''Unleash the Light''}} |
{{DISPLAYTITLE:''Unleash the Light''}} |
||
| + | |||
[[es:Libera la Luz]] |
[[es:Libera la Luz]] |
||
[[pt-br:Libere o Prisma]] |
[[pt-br:Libere o Prisma]] |
||
[[ru:Освободить Свет]] |
[[ru:Освободить Свет]] |
||
[[pl:Unleash The Light]] |
[[pl:Unleash The Light]] |
||
| + | |||
[[Category:The Light Series]] |
[[Category:The Light Series]] |
||
[[Category:Merchandise]] |
[[Category:Merchandise]] |
||
Latest revision as of 10:26, 13 February 2024
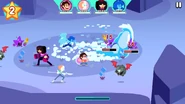
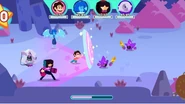
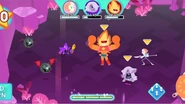
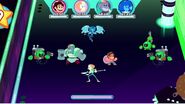
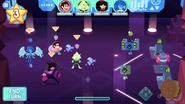
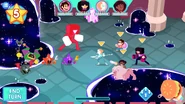
Steven Universe: Unleash the Light is a mobile game developed by Grumpyface Studios that was announced as part of the Apple Arcade Announcement Event on September 10, 2019.[1] The game was co-written by Rebecca Sugar and is a direct sequel to Attack the Light and Save the Light, featuring similar gameplay.
The game was first released on the Apple Arcade catalog on November 27, 2019, [2] and later for PS4, Xbox One, Xbox Series X/S, Nintendo Switch, and Steam on February 19, 2021.[3]
Synopsis
“Steven Universe: Unleash the Light,” is an original Cartoon Network game, co-written by Rebecca Sugar, where players pick their favorite characters, choose which Gems are in their party, unlock awesome new abilities and equip alternate costumes in the ultimate mobile role-playing game (RPG).
Features
9 PLAYABLE CHARACTERS
Play as your favorite Steven Universe characters, including Steven, Garnet, Pearl, Amethyst, Lapis Lazuli, Bismuth, Peridot, Connie, and Greg!
CUSTOMIZE YOUR TEAM
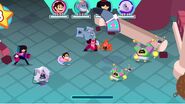
Choose which Gems are in your party, unlock awesome new abilities, and equip alternate costumes. Plus, change formation in battle to gain the advantage.
TWO NEW GEMS
Face off against two new Prism-wielding Gems co-created by Rebecca Sugar. Who are they and what are they plotting?
FUSION TIME!
Team up for amazing combo attacks and Gem Fusions! Fuse to play as Smoky Quartz, Sunstone, Rainbow Quartz 2.0, and Obsidian!
ORIGINAL VO
“Unleash the Light” features an original story co-written by Rebecca Sugar and voiceover from the Steven Universe cast and special guest star Christine Baranski.[4]
Plot
v1.1.0
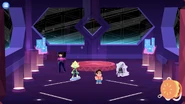
It starts off with Steven finishing writing new rules for Era 3 accompanied by Blue Pearl, Yellow Pearl, and Pink Pearl in the Diamond Throne Room at Gem Homeworld. While having a conversation, Yellow Pearl mentions that there are two Light Prisms still active and she has been contacting two Gems named Pyrope and Demantoid; thus far she was unsuccessful. Blue Pearl states that if they don't respond they could send a battalion to retrieve the Prisms by force which Steven disagrees to. Pink Pearl asks what the right solution is and Steven answers that he knows the right team for the job.
Steven brings the Crystal Gems to the Palace of Light which is owned by the two Garnets. When he tries to introduce himself to Demantoid, Pyrope interrupts asking Demantoid who she's talking to. Upon realizing who he is Pyrope hurriedly tells them the palace is closed and the two take their leave. While the Crystal Gems think about how to enter, they once again encounter Hessonite's Prism who not only took on a new form but has chosen the name George. George shows them that he can dissipate Prism-protected doors only to discover that the rest of the palace is locked and they need rainbow keys to enter. This is 'helpfully' pointed out by Hessonite who has become a 'mysterious ally' to the gems. The gems decide to follow Demantoid after hacking a comlink from a previous colony in the making with Pearl staying to find out more about Demantoid while Lapis Lazuli goes with them to one of Yellow Diamond's mining colonies.
In Crystal System Colony 215, it's revealed that Demantoid has been releasing Light constructs through the colony disrupting the work of several Peridots. One of said Peridots, Peri Pal informs Steven that the Peridots know due to the commlinks before Demantoid cut all communication from Homeworld and prohibited any interaction with Steven, unfortunately, the Light constructs from her Prism are causing damage to their buildings which makes the Crystal Gems help them and Pearl informs Steven that Demantoid and Pyrope after hearing of Era 3 saw it as a chance to make their own empires due to the power vacuum caused. After fighting Light constructs controlling a drill they discover Demantoid already left to another colony owned by her.
In Demantoid's world they learn she has been using Light constructs to replace her Bismuths during its terraformation. The Bismuths, unable to continue their work are wondering what to do now. Steven explains that the new rules of Era 3 set them free and they should have their own ruling system. Along the way, they meet Bismuth who reveals to have made a Prism Containment Chest to disable both Prisms. After fighting several constructs they encounter Demantoid who modified her Prism. Steven tries to convince her to surrender, only for Demantoid to reply that, for her, Steven's Era 3 is a chance for them to make their own empire now that he has proven that the Diamonds are obsolete. After defeating her Bismuth tries to use the box only to be attacked by Demantoid until Steven saves her by throwing his shield. The Bismuths decide to rebel against Demantoid only for her to leave with the box much to the disappointment of the Crystal Gems. The group decides to follow her to Blue Colony 4 controlled by Pyrope.
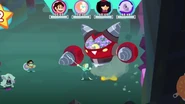
Upon arrival, the Gems find the colony in ruins and are confused when the inhabitants, a variety of Jades seem worried to speak with them. One Jade reveals that the Palace of Light was formerly located on the planet and they have not been permitted to receive broadcasts or leave. After navigating the colony the team encounters another group of light constructs who have taken the forms of Garnet, Amethyst, Pearl and Steven to battle them. They then set their sights on the Palace of Light to unlock all the doors and confront Pyrope face to face.
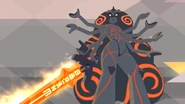
Once they unlock all the barriers the Crystal Gems fought through Pyrope's residence to find her sitting in her personal room. They attempt to convince her to stop using the prisms when Demantoid arrives and begins to bicker with Pyrope. Bismuth, noticing the box, tells Steven she will try to take it before Hessonite arrives to "aid" them. Hessonite brags to the other Garnets about her humbleness before she is struck, knocking off her scarf and visor. Pyrope is surprised by this and Demantoid says that there is still time to join them, but Hessonite refuses. Demantoid states that she wasn't talking to her but George who she captures and combines with the other two prisms. After fighting the two Garnets and their Prism monster Steven convinces George to fight back before being silenced by Demantoid. This causes Hessonite to stand up to her and apologize to George telling him he doesn't have to be a weapon anymore. George causes the monster to defuse and reunites with Steven. With her Prism locked away, Demantoid loses her Limb Enhancers and blames Pyrope who blames her back. The two poof each other and Hessonite takes over the palace promising to open it back to gemkind. George has Bismuth release the other prisms, and he convinces them the three of them are now free. Pearl then reminds Steven that there are still other colonies that are yet to be freed, so the Crystal Gems decide to stay in Homeworld for a while to help establish Era 3.
After the credits roll, a mysterious green ship resembling the one used by "Squaridot" comes into view and a laugh similar to the ones made by Peridots is heard before disappearing.
v2.0
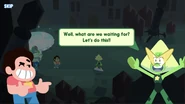
After reaching Chapter 3, a strange transmission appears in Pyrope's World. While investigating, George reveals the signal's source: Crystal System Colony 215. Returning to the alien plant reveals a new level, 1-10. When the Gems arrive, they encounter a flustered Peridot, and together they journey into the Kindergarten and encounter the source of the transmission, Squaridot. The angry gem demands Steven deliver the Prism to her, before awkwardly signing out.
Peridot reveals that she let Squaridot out of her bubble, hoping to have her unite with the Crystal Gems. She also tracks Squaridot's location to Hessonite's warship, and the Gems travel there to confront her.
On the warship, power is turned off and Steven and his friends make their way through the locked doors to Squaridot. Finally, they arrive at the ship's controls and fight Squaridot, but it turns out to be a Squaribot decoy. The real Squaridot emerges, controlling the computer, and the team battles her and her army of Squaribots as Peridot hacks the system to shut it down.
After the final battle, Peridot successfully hacks the system and releases Squaridot of her control. However, she has no memory of the events and was only trying to locate Hessonite. Upon activating the ship's emergency protocol, Squaridot was controlled by the program to find the Prism. Squaridot begrudgingly thanks the Gems and is taught about Era 3, while Steven invites her to Beach City.
v3.0
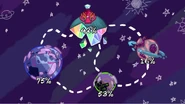
George was surprised about the distress signal, and Peridot tells the Gems what they received, so Peridot said that it came from the black hole, Garnet agreed, "the same black hole that out Yellow Colony 4" from the looks of it. Steven said "Whoa", as Peridot, "Whoa is right", as they have to stay away from there, but she's getting strange readings originated from it, and extremely mysterious and alluring and Steven was curious to check it out. But before that at the entrance of the Palace of Light, he heard a roar was Lion and Connie have arrived that she's caught up on schoolwork and ready to liberate the galaxy and Steven cheers. She hears about the Prism mission, and meets George and looks amazed, she was curious about the this place, and do walk and talk and Steven agreed, so Steven and the Gems travel to the black hole where it sucked up Yellow Colony 4.
Characters
Playable
- Steven Universe
- Pearl
- Garnet
- Amethyst
- Lapis Lazuli
- Bismuth
- Peridot (v2.0 update)
- Connie and Lion (v3.0 update)[5]
- Greg Universe (v4.0 update)[6]
- Hessonite (v4.0 update)
Fusions
- Rainbow Quartz 2.0
- Sunstone
- Smoky Quartz (v1.1.0 update)[7]
- Obsidian (v3.0 update)
NPCs
- Blue Pearl
- Yellow Pearl
- Pink Pearl
- 2 Light Prisms
- Pink Diamond (mentioned)
- Demantoid's Peridots (debut)
- Demantoid's Bismuths (debut)
- Pyrope's Jades (debut)
- Hessonite (playable against the Prism fusion in v1.1.0 update)
Bosses
- Light construct drill (debut)
- Demantoid (debut)
- Crystal Gem Light constructs (debut)
- Pyrope (debut)
- Prism Fusion (debut)
- "Squaridot" (v2.0 update)
- Squaribots (debut; v2.0 update)
- Pyrope Light construct (debut; v3.0 update)
- Demantoid Light construct (debut; v3.0 update)
- Hessonite (v4.0 update)
Locations
- Gem Homeworld
- Crystal System Colony 215 (debut)
- CSC-215 Kindergarten (debut)
- Demantoid's World (debut)
- Pyrope's World (Blue 4) (debut)
- Palace of Light (debut)
- Yellow 4 (mentioned)
- Earth (mentioned)
- Beach City (mentioned)
- Beach House (title screen)
- Little Homeworld (mentioned; v2.0 update)
- Connie's school (mentioned; v3.0 update)
- Beach City (mentioned)
- Hessonite's warship (v2.0 update)
- Black Hole (debut; v3.0 update)
- Other colonies (mentioned)
- Rose's Room (v4.0 update)
Objects
Items
Steven's Items
- Cookie Cat - Restores some health. Yum!
- A Big Donut - Restores a lot of health. Tasty!
- Ube Roll Cake - Restore TONS of health. Just divine!!
- Together Breakfast - Restores some health for the full team. So good!
- Together Forever Breakfast - Restores a lot of health for the entire team! Hooray!
- Star Fruit - Adds 3 Star Points in Battle. So useful!
- Super Star Fruit - Adds 6 Star Points in Battle. Wow!!
- Star Melon - Adds 1 Star Point every turn for the next 9 turns.
- Lucky Crown - Increases Luck for the next 5 turns.
- Feelgood Tea - Removes negative status effects. How nice!
- Feelgreat Tea - Removes the WHOLE TEAM’S negative status effects.
- Gamepad - Allows a second Formation Swap to be used in a single turn.
- Wailing Stone - Every enemy will target the chosen character for the next 3 turns. (Doesn’t stop area or lane attacks from hitting teammates.)
- Fire Salt - Attacks and blocks apply Burn effect to enemies for 4 turns.
- Ninja G.U.Y. - Prevents being directly targeted by enemies for the next 3 turns. (Doesn’t stop area or lane attacks from hitting teammates.)
- Fry Bits
- Ranch n' Bacon Fry Bits - The entire team receives a small health regen every turn for the next 5 turns.
- Bicycle Helmet - Increases Defense for the next 5 turns.
- Beefy Sweatband - Increases Attack power for the next 5 turns.
- Friendship Glow Bracelet - Partially fills the Teamwork Bar.
- Rose's Tear - Revives a teammate with a little health.
- Bottle of Rose's Tears - Revives a teammate with a lot of health.
- Redo Idol - Reset one character’s upgrades and return all upgrade points, allowing them to be re-spent. (Cannot be used while in Battle)
- Level Up Idol
Quest Items
- PrismDex
- Prism Containment Chest
- Forging List
- Bismuth's Gem
- Jade's Fan Art
- Red Chroma
- Orange Chroma
- Yellow Chroma
- Green Chroma
- Blue Chroma
- Indigo Chroma
- Purple Chroma
- White Chroma
- Costume Schematic
- Containment Chest Schematic
- Charm Schematic
- Battle Gift Schematic
Badges
- Harmony Badge: Increases total health by 10%.
- Attack the Light Badge: Increases ATTACK by 5%.
- XP Badge: Gain XP 15% faster!
- Frontline Badge: Increase DEFENSE by 10% while in the front position of the team formation (while enemies are on that side.)
- Protected Badge: Restores a small amount of health every turn while in the back position of the team formation.
- Flanker Badge: Increase ATTACK by 5% when in top of or bottom position of the formation.
- Smooth Moves Badge: Changing this character's formation position grants them a small heal.
- Recharge Badge: Slowly regenerate health every turn. Stacks with other regeneration effects.
- Immunity Badge: 25% chance to resist all negative effects.
- Hardhat Badge: Immune to STUN effects.
- Bismuth's Armor Badge: Wearer starts battles with an armor pack.
- Star Starter Badge: The Star Meter begins with 1 SP higher than normal at the start of battle.
- Lucky Flame Badge: Luck hits have a chance to apply BURN effects to enemies.
- Lucky Restore Badge: Luck hits have a chance to restore health.
- Lucky Zap Badge: Lucky hits have a chance to electrocute enemies.
- Lucky Berserker Badge: While at 15% health or lower, all attacks are guaranteed to be Lucky.
- Lucky Star Badge: Lucky hits have a chance to restore 1 star point.
- Berserker Badge: While at 15% health or lower, automatically receive an ATTACK buff.
- Teamwork Badge: Wearer's perfect attacks and blocks generate 15% more Teamwork Points.
- Freebie Badge: Small chance on every attack to randomly make one of your abilities 0 SP for one use.
- Turtle Badge: Increases defense by 25% but reduces attack by 30%.
- Shamrock Badge: Increases luck by 95%, but reduces defense by 50%.
- Star Cap Badge: Increases max star points for the team from 10 to 12.
- Grumpy Badge: Increases attack by 30%, but reduces defense by 50%.
- CBF Badge: Reduces the entire team's stats by 50%. For those who want a new challenge!
- Sparkly Badge: The wearer is now sparkly for some reason. Really, that's all it does.
- Insult Badge: Wearer's actions generate more threat than normal, causing enemies to attack them more often.
- Sneaky Sneaky Badge: Enemies have a harder time noticing wearer, causing then to attack less often.
- Fusion Badge: Wearer's fusions remain active for two additional turns!
- Engineer Badge: While wearer shares a position with a Robonoid, that Robonoid takes 0 damage from enemy attacks.
- Onion's Badge: The wearer's Perfect Blocks now always BURN enemies.
- Prism Pal Badge: George's teamwork ability grants a Teamwork Buff to the wearer. While active, every ability used by the wearer generates bonus Teamwork points.
- Rose's Tear Badge: After being defeated, there's a 33% chance on every turn to automatically revive.
- Ambidextrous Badge: The wearer can now activate two costume perks at once.
Alternate Costumes
Steven
- Costume #2: Varsity Jacket [Blue and Black Variation] - Extra Pockets: Once per battle, allows two items to be used in a single turn.
- Costume #3: Pink Diamond Outfit - Perseverance: The first time Steven is defeated in battle, he will automatically revive with low health.
Garnet
- Costume #2: First regeneration - Future Vision: When Garnet is in her counterattack stance if any ally is attacked under 25% HP, that attack transfers to Garnet multiplied by 50%.
- Costume #3: "Cotton Candy" Garnet - Made of Love: Garnet now regenerates a small amount of health every turn.
Amethyst
- Costume #2: Third regeneration - Super Star Whip: When Amethyst defeats an enemy with her whip attack, it's guaranteed to drop a star point.
- Costume #3: First form - Undercooked: After being poofed, Amethyst will always automatically reform after two-player turns.
Pearl
- Costume #2: First regeneration - Tactician: Pearl is able to activate a second Formation Swap on any turn.
- Costume #3: First form - Do it for Them: If Pearl is defeated, the rest of the party automatically receives a heal and Attack buff.
Lapis Lazuli
- Costume #2: Pre-regeneration - Inner Turmoil: Lapis has a 15% chance to complete focus instantly after starting it.
- Costume #3: Bob Outfit - Batter Up: While in Focus, Lapis cannot be interrupted by small and medium projectiles, and also knocks them back to her attacker.
Bismuth
- Costume #2: First regeneration - Armorsmith: Bismuth begins every battle with an armor pack.
- Costume #3: Current form - Master Builder: Bismuth has a 20% chance to finish forging immediately after starting it.
Peridot
- Costume #2: Pre-regeneration - Gem Technician: Peridot now automatically places a Robonoid after her first formation swap in every battle.
- Costume #3: Yellow dress - I've Come So Far: Every time the Teamwork Bar is filled, Peridot encourages her friends and all characters receive a small heal.
Connie and Lion
- Costume #2: Training Outfit - Extensive Training: Connie & Lion now achieve "Lucky Blocks" when performing a perfect block. Lucky Blocks reduce 25% more damage than normal.
- Costume #3: Debut Outfit - Well Studied: Every time the teamwork bar is filled, Connie & Lion receive an Expertise buff that lowers the SP cost of all their abilities by 1 for the remainder of the turn.
Achievements
- Pearl-fect: Perform 10 Perfects in a row (without missing any perfect attacks or blocks).
- Giant Woman: Perform any fusion.
- Risky Bismuth: Protect your teammate from Demantoid. (Secret)
- The Box That Rocks: Prevent the Prism Containment Chest from being stolen. (Secret)
- Over 9000: Fully Level Up all of the Crystal Gems.
- Steven's RPG: Learn the ropes.
- Across The Universe: Unlock and visit every stage.
- Attack the Light: Defeat 100 Light Constructs.
- Perfect Porkchop: Complete the game to 100%.
- It's A Wash: Defeat three enemies at once with Lapis' Tidal Wave.
- Rock The Vote: Establish Democracy in a formerly-conquered Gem colony. It's always important to vote!
- Attacked, Saved, Unleashed: Liberate the other Prisms.
- Captain Universe: Hit at least 6 enemies with one Shield Throw.
- Cookie Cat Recall: Complete any Chapter 3 battle stage without using any items.
- Keys are the Key, You See: Unlock every Light Barrier in the Palace of Light.
- It's A Secret to Everybody!: Discover a secret room!
- Shorty Squad: Complete 10 battles with Amethyst and Peridot in your party.
- Green Thumb: Use Peridot's teamwork ability to summon a loyal friend...
- Be There Or Be Square: Decipher the mysterious space message.
- Era 3 Winning Spree: Complete the Secret Chapter.
- Clod Goals: Defeat 3 enemies at once with Peridot's Self Destruct Robonoids ability.
- The Cat-valry's Here: Defeat 2 or more enemies with a single use of Connie & Lion's Lion Charge ability.
- Prismatic Procuration: Collect a Rainbow Charm
- Little Homeschool: Recieve an "A++" Grade in the Black Hole chapter.
- Crying Breakfast Friend: Complete any run of the Black Hole chapter while wearing the CBF Badge the entire time.
- Space Train to the Cosmos: Complete the Black Hole chapter on all 3 difficulties.
- Jam With Your Old Man: Have a jam session with Steven and Greg.
- Precious Stone: Fully rank up one character in Rose’s Room.
- Rose’s Room: Complete a full Magical Mission in Rose’s Room.
- Graced by Her Presence: Convince an unlikely ally to become a Crystal Gem.
- The Tiny Floating Whale Approves: Complete a Magical Mission in Rose’s Room without any characters being defeated.
- Can’t Believe We’ve Come So Far: Complete every character’s Magical Mission in Rose’s Room.
Note: Achievements with the (Secret) denomination were added in the Ver. 1.1.0 update. In the game, only one is obtainable (besides resetting your save data) depending on your choice in the Chapter 2 boss. This has been changed in Ver. 3.0 update. where you can now battle the Chapter 2 boss again.
Trivia
- Players are able to change the outfits of playable characters.
- Once you 100% the game, you unlock Steven's Black Shirt, It is a variation of the Varsity Jacket Outfit.
- Bismuth's voice is provided by Miriam Hyman instead of her usual voice actress, Uzo Aduba.
- There are no plans for an android version.[8]
- The game has some meta-awareness:
- One of Steven's lines when entering a level is: "You know, for Prisms saving adventures, third time's the charm!", a reference that this game is the third one in the Light Series.
- If you select Pearl from the menu, one of her quotes is "What's this about a bird mom?", a reference to the popular nickname given by the fandom.[9]
- Pearl also says "Steven, can you explain it to me again. What is a 'meme'?", might be a reference to Momocon 2017 where people taught Deedee Magno-Hall about memes.
- One of the items used by Garnet is pastel blue-and-red colored Cotton Candy Gauntlets, a reference to her fan nickname "Cotton Candy Garnet" (her form when Ruby and Sapphire first fused).
- Another item that references this is the Cotton Candy Keytar.
- Some of Lapis' lines reference her being a DLC character that never released for Save the Light:
- "Hey guys, sorry I'm late."
- "Looking forward to helping out this time."
- "Yep, I'm here this time."
- "Better late than never."
Cultural References
- When using her "Focus" ability, Lapis says "You wouldn't like me when I'm mad.", a reference to the Incredible Hulk.
- One of Lapis' menu lines is "I fight for my friends.", which may be a reference to a popular quote spoken by Ike in the Super Smash Bros. series.
- One of Connie's menu lines is "Good deduction never fails, that's for certain!", a reference to the theme song for DuckTales.
- Sometimes when opening a chest, Steven sings a tune that references the chest opening and item obtained sound effect in the Legend of Zelda series.
- The "F-Capacitor" is possibly a reference to the flux capacitor from the Back to the Future franchise.
- The "Over 9000" achievement is a reference to the famous "IT'S OVER NINE-THOUSAND!" line from Dragon Ball Z.
- Connie saying "Adventure is out there!" references a line from the movie Up, the same line is referenced in Save the Light.
- One of Bismuth’s Charms is a reference to the Master Sword from the Legend of Zelda Series.
- One of Peridot’s Charms is an alien plush that is a reference to Mario from the Super Mario Series.
Continuity
- The shop statue that first appeared throughout Attack the Light returns and is revealed to depict a fusion of all three Prisms.
- Of the three possible endings to Save the Light, Unleash the Light follows the one where the Prism chooses to stay on Earth. This is shown when George is seen to have abandoned his "Light Steven" form and Steven mentions him having been exploring Earth upon his return.
- The game is set between "Change Your Mind" and Steven Universe: The Movie as Steven is 15 years old.
- The app's home screen shows the Beach House already updated to its layout seen in the movie.
- When facing the Crystal Gems' Light Construct copies Lapis recalls the events of "Ocean Gem".
- Some of Garnet's lines reference past songs:
- "I will fight for the place where I'm free." from "We Are the Crystal Gems".
- "Back together (again)." and "Try to hit me if you're able." from "Stronger Than You".
- Pearl's line "Everything I am, I give on the battlefield" is a reference to "Do it for Her".
- Her line "It's not over" is a possible reference to "It's Over Isn't It".
- Her line "Whoopsie-daisy" after recovering from being poofed is a reference to "Steven the Swordfighter".
- "Some achievements reference past events:
- The "Giant Woman" achievement is a reference to Steven's nickname for Opal in "Giant Woman".
- The "Attack the Light" achievement is a reference to the first Light game, Attack the Light.
- The "Attacked, Saved, Unleashed" achievement is a reference to all the Light games.
- The "Perfect Porkchop" achievement is a reference to Greg's popular catchphrase as well as previous achievements from Attack and Save the Light.
- The "Cookie Cat Recall" achievement is a reference to Cookie Cats getting discontinued prior to the original series starting.
- The "Shorty Squad" achievement is a reference to Amethyst's nickname for her, Steven, and Peridot in "Too Short to Ride".
- Gems are still having trouble adapting to Era 3.
- At the end of 1-10, Peridot mentions the events of Save the Light in which Squaridot was defeated, as well as the events of "Catch and Release."
- It's revealed that the reason behind Bismuth's current regeneration, was because she was poofed by Demantoid after attempting to trap her Prism in the container box.
Transcript
View the game's transcript here.
Gallery
Videos
External Links
References
- ↑ "Apple Arcade invites you to play something extraordinary" – Apple Newsroom
- ↑ https://twitter.com/cartoonnetwork/status/1199734739659350017 – Cartoon Network
- ↑ https://twitter.com/cartoonnetwork/status/1360302658142097410
- ↑ https://apps.apple.com/app/unleash-the-light/id1434863691?ign-itsct=stevenuniverse&ign-itscg=30800
- ↑ https://grumpyfaceblog.tumblr.com/post/648380152718442496/new-adventurers-approaching-connieandlion-are#notes
- ↑ https://twitter.com/Grumpyface/status/1537516911361003520
- ↑ "A new free content update (v1.1.0) is now available for Steven Universe: Unleash the Light on Apple Arcade!" – Grumpyface Studios on Tumblr
- ↑ https://grumpyfaceblog.tumblr.com/post/689512004275339264/will-unleash-the-light-have-a-new-update-to
- ↑ https://twitter.com/caitvihugs/status/1199843080805011457

